Build Visual Workflows
The Visual Code Editor starts with a Begin action and an option to add the first command. Each command you add becomes a visible action in the workflow.
Actions are connected in the order they should run. This makes longer PDMShell scripts easier to review before you execute them.
Basic Workflow
A typical workflow is built like this:
- Start from the Begin action.
- Add the first command.
- Edit the command settings.
- Add the next command.
- Connect each action in the order it should run.
- Validate the workflow before running it.
The visual workflow and the generated script stay connected. The visual layout helps you understand the process, while PDMShell still runs the real command text.
Finding Commands
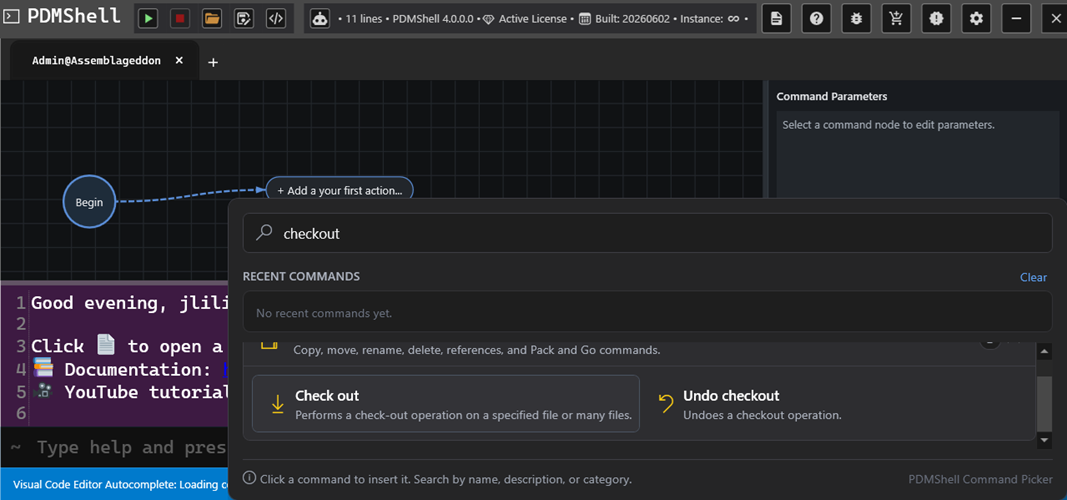
Use the command picker to search by command name, description, or category. For example, searching for checkout can show related commands such as Check out and Undo checkout.
This is useful when you know what you want to do but do not remember the exact command name or syntax.
Working With Larger Workflows
Larger workflows can extend beyond the visible area. Use the navigation controls to make the workflow easier to review:
- Zoom In makes actions larger.
- Zoom Out shows more of the workflow.
- Zoom To Fit fits the workflow into view.
Branching
Use IF statements and conditions when the workflow needs to choose between two paths.
Examples:
- Continue only when a file name contains
ECO. - Run one action when a value matches and another action when it does not.
- Check whether a file or folder exists before continuing.